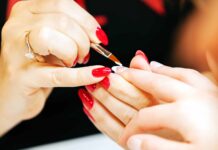
Are you looking to elevate your nail game and try your hand at nail art? Nail art has become increasingly popular in recent years, with countless designs and techniques to choose from. But where do you start? What is the first step in nail art? In this blog post, we will break down the essentials of nail art and provide you with the necessary information to kickstart your nail art journey.
The first step in nail art is to prepare your nails properly. This step is crucial as it sets the foundation for any nail art design you choose to create. Here are some key components of nail preparation:
1. Clean and Trim: Start by cleaning your nails thoroughly to remove any dirt or oil. Trim your nails to your desired length and shape them with a nail file. Make sure to also push back your cuticles for a neat appearance.
2. Base Coat: Applying a base coat is essential as it serves as a protective barrier between your nails and the nail polish. It helps to prevent staining and strengthens your nails to prevent breakage.
3. Choose a Design: Once your nails are prepped, it’s time to choose a nail art design. Whether you opt for a simple accent nail or intricate nail art, the choice is yours. You can find inspiration from social media platforms like Pinterest or Instagram.
4. Gather Supplies: Depending on the design you choose, gather all the necessary supplies such as nail polish, nail art brushes, dotting tools, and nail stickers. Having all your tools ready will make the process smoother and more enjoyable.
Now that you’ve prepped your nails and chosen a design, it’s time to get creative! Here are some practical tips for achieving the perfect nail art look:
– Practice Makes Perfect: Nail art requires patience and practice. Don’t be discouraged if your first attempt doesn’t turn out as expected. Keep practicing to improve your skills and create stunning nail art designs.
– Experiment with Colors: Don’t be afraid to mix and match different nail polish colors to create unique designs. Experimenting with colors can lead to unexpected and beautiful results.
– Seal with a Top Coat: Once you’ve completed your nail art design, finish it off with a top coat to seal in the design and add a glossy finish. A top coat also helps to extend the longevity of your nail art.
In conclusion, the first step in nail art is to properly prepare your nails by cleaning, trimming, and applying a base coat. Once your nails are prepped, choose a design, gather your supplies, and get creative! With practice, patience, and the right tools, you can create stunning nail art designs that showcase your personality and style. So, what are you waiting for? Start experimenting with nail art today and unleash your creativity!


