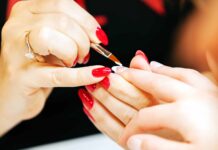
Are you tired of your press on nails looking fake and unnatural? Do you want to achieve a more realistic and salon-quality look? If so, you’ve come to the right place. In this blog post, we’ll walk you through step-by-step on how you can make your press on nails more realistic and professional-looking.
Press on nails have become increasingly popular in recent years as a convenient and affordable way to achieve gorgeous manicures at home. However, sometimes they can look fake or bulky, which can take away from the overall look. By following these simple tips and tricks, you can elevate your press on nails game and achieve a more realistic and natural look.
Step 1: Choose the right size and shape
One of the most important factors in making your press on nails look realistic is choosing the right size and shape. Make sure to measure your nails accurately and choose press ons that fit your nail beds perfectly. Additionally, opt for a shape that complements your natural nail shape, whether it’s square, oval, almond, or stiletto.
Step 2: Prep your nails
Before applying your press on nails, it’s crucial to prep your natural nails properly. Start by removing any old polish, buffing the surface of your nails, and pushing back your cuticles. This will create a smooth canvas for your press ons to adhere to and ensure they last longer.
Step 3: Use quality adhesive
Invest in a high-quality nail glue or adhesive to ensure your press on nails stay in place and look more natural. Avoid using cheap glue that can cause your nails to pop off or look lumpy. Apply a small amount of adhesive to the back of your press on nail and press it firmly onto your natural nail, holding it in place for a few seconds.
Step 4: Shape and file
After applying your press on nails, use a nail file to shape and smooth out any rough edges. This will help blend the press ons seamlessly with your natural nails and give them a more polished look. Be gentle when filing to avoid damaging your nails or the press ons.
Step 5: Finish with top coat
To seal the deal and add extra shine and longevity to your press on nails, finish off with a high-quality top coat. This will help protect your manicure from chipping and give it a professional, salon-quality finish. Choose a fast-drying top coat to speed up the process and enjoy your stunning press on nails.
By following these simple steps and tips, you can make your press on nails look more realistic and polished. Remember to choose the right size and shape, prep your nails properly, use quality adhesive, shape and file, and finish with a top coat for the best results.
In conclusion, achieving a realistic and professional-looking manicure with press on nails is easier than you think. With the right tools and techniques, you can enjoy gorgeous nails that look like they were done at a salon. So go ahead, give these tips a try and elevate your press on nail game today!


